Affichage des articles dont le libellé est Audio. Afficher tous les articles

vendredi 1 juillet 2016

Top 5 Troubleshooting Tips for an iPod Mini

Top 5 Troubleshooting Tips for an iPod Mini


For years now, the iPod Mini has been your constant companion at the gym, supermarket, and on your way to work. You can count on it to brighten up a dull commute, motivate you on the treadmill, and entertain you whenever you are bored. But just like any other electronic device, you
r iPod Mini may malfunction at some point, whether due to wear and tear or an accident. Before visiting the Apple store to get your iPod Mini repaired, check out these simple troubleshooting tips that can help you diagnose the problem and maybe even fix it yourself.

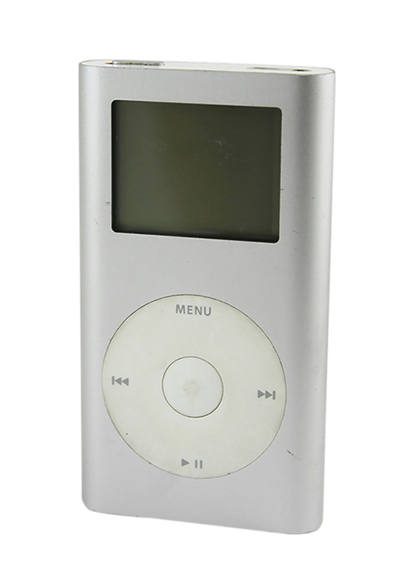
How to Troubleshoot an iPod Mini

Before fixing your iPod Mini, first identify whether you are using a first or second-generation model. While the two versions look almost identical on the outside, the inner workings are different. When replacing certain parts like the display assembly or the battery, make sure you choose parts compatible with your specific model.

Resetting Your iPod Mini

Before panicking that there is something wrong with your iPod Mini's battery or logic board, do some basic troubleshooting. If your device has frozen up, sometimes a simple reset is all it takes to get your device back to normal.
To reset your iPod Mini, slide the Hold switch to the Hold position and then slide it back to the Off position. Press the Menu and the Select buttons simultaneously; hold them for 6 to 10 seconds until you see the Apple logo. If this does not work, check to see if you have a battery problem by connecting your device to an iPod Mini charger and plugging it into a power outlet.
Try resetting your iPod Mini again with it plugged in. If the device turns on, connect it to your computer's USB port and open iTunes. Connect to the Internet and see if you need to install a new software update.
If your iPod Mini still does not work and you keep getting a sad iPod face or a folder on the screen, you may want to consider restoring the device, which means erasing all the files on the disk. You should only do this if you have backed up all your files in your iTunes library.

Checking the Battery Life

If the battery life of your iPod Mini keeps getting shorter and shorter, your battery may be due for a replacement. You can test the battery life by playing a 3-minute song on repeat until the battery is fully depleted. Before doing this, make sure the device is fully charged. Next, make a note of when the iPod started playing and when it turns off. First generation iPod Mini batteries should allow 8 hours of continuous playback time, while the second generation Minis should play for 18 hours.
If the playback time is significantly less or if the iPod Mini does not even register when you plug it into a power outlet or a computer, you should change your battery. If the battery is functioning normally but you still prefer longer playback hours, consider buying a power bank, which is a portable battery charger that allows you to charge your iPod Mini any time.

Repairing the Logic Board

If the iPod Mini has a blank screen when you turn it on, determining whether the problem lies in the display screen or logic board is your first step. Hold the iPod next to your ear; if you hear the hard drive whirring smoothly, the display may be the issue. Also try to play a song using the click wheel if you know which buttons to press; if the song plays, this also points to a display problem rather than a logic board malfunction. However, if the iPod Mini is unable to play and does nothing when attached to your computer, then a logic board replacement may be in order.

Replacing the Click Wheel

Sometimes, the device does not work due to a faulty click wheel. If both the display and logic board work properly but the click wheel is not sending your instructions, you can replace it using a replacement click wheel kit.

Fixing Distorted Audio

Try the device with a different set of headphones or speakers. If the sound quality does not improve, you may need to replace a faulty audio-out jack board.

iPod Mini review


Welcome to Ahmed III review
Your Guide to Restoring an iPod Mini
Trying to listen to music on your iPod Mini and repeatedly getting an error messag
e is frustrating. Other times, it is a blank screen, or maybe the iPod display starts messing up. Whatever it is, something tells you that your iPod Mini is not working correctly. After trying other troubleshooting options, such as resetting your iPod Mini or updating the iPodsoftware, you may have no other choice but to completely restore your iPod. While this may seem like a daunting task, it does not have to be. By backing up your media and using iTunes to restore your iPod Mini, you can return your device to working status quickly and easily.


Backing Up an iPod Mini

Before beginning, it is important to understand the difference between resetting an iPod and restoring it. Resetting an iPod Mini is similar to rebooting a computer, restarting the hardware and software. In this case, the resetting process does not even touch your media, and you can access all of it once the process is complete.
Restoring an iPod Mini, on the other hand, returns the device to its factory settings. Your device becomes the same as it was out of the box. This erases any media you have installed on the iPod Mini. Because of this, it is a good idea to back up your iPod Mini before restoring it, so that you can keep any media you have.

Preparing Your iPod Mini

Before copying files, you must first set your computer to recognize your iPod Mini as an external hard drive. To do this, start by plugging your device into your computer using a USB cable or firewire cable. Then, open iTunes and wait for the software to recognize the iPod Mini. Once it does, click on the iPod Mini in the "Devices" panel. This opens your device in iTunes, allowing you to access specific settings.
Select the "Summary" tab at the top of the device menu. Scroll down until you find the option to "Enable Disk Use." Select this, save, and exit. This allows your computer to recognize the iPod as a storage disc that it can access and change.

Copying Your Media

Once your computer recognizes the iPod Mini as a storage disc, you can then copy any music files to your computer hard drive. The process of this, however, is different, depending on whether you use a PC or Mac.

Computer Type

Process

PC
Click the "Start" menu
Select "My Computer" or "Computer"
Double-click the device to open it
Go to "Ipod_Control" to access your specific media
Highlight all files and folders
Right click and select "Copy"
Create a new folder on your computer hard drive
"Paste" the files in to copy them
Mac
Check the desktop for an iPod Mini icon
Click that icon
Go to "Ipod_Control" to access your specific media
Highlight all files and folders
Hold the "Command" key and press "C" to copy the files
Create a new folder on your computer hard drive
"Paste" the files in to copy them

When the media is stored on the iPod, the folders and filenames change so that you cannot tell what file is what; however, the information within the file remains correct. When you copy the files back, your iPod can sort and reorder the media.


Restoring an iPod Mini

Once you have finished copying the content, you are ready to restore your iPod Mini. Open iTunes and go back to your device. Go to the "Summary" tab and look for the "Restore" button. Once you click this button, the restore process starts. Before pressing it, you want to be sure that you have backed up everything and are ready to erase your iPod Mini.
Click the "Restore" button to restore your iPod Mini to its factory settings.


Recovering Media

Once the restoration process is complete, it is time to resync all of your media so you can access it. While in iTunes, open the "File" menu. If you do not have a file menu, press "CTRL-B" to show the menu bar. From the "File" menu, select "Add Folder to Library" on a PC or "Add to Library" on a Mac. Select the folder that you copied all of your media into and add it to your library.
iTunes automatically sorts out the files and lists them in order. You can then copy them back to your device to return it to its previous state.


mp4 review


Welcome to Ahmed III review

I am writing this to explain why the touch screen mp4 is such a great player and why you really get your moneys worth. 
Recently i bought an Touch screen mp3/mp4 player. also know as the Onda touch or the Cherry. You can get them all over ebay for a way cheaper price than you can get an Ipod Touch. There is a 2gb model and a 4gb model. This player includes Fm tuner voice recording music play back and video. The music quality is very nice and there is a external speaker that works great. The Fm tuner is a bit cheap but still works nice.the antenna is your headphones so quality diminishes a bit because of that. The video playback quality is nice and clear but only AVI is supported so you will need to use the included program which takes some time to convert movies. Overall this is a very nice item and the touch screen quality is pretty good. i have never had to tap the screen more than 2-3 times. Normally within one tap it responds great. The frame is very nice and the player already comes with a screen protector so no need to buy a protector. Also it is rather had to find a silicon skin for this player but i found that with a little work the Samsung Y-P2 skin works just great and it is rather cheap to buy. The included headphones are not that bad either. So overall i give this player a 8.5/10.  The average price for this is around 60-75$ with shipping. Hope this helped you!